In this series, we will be recreating the popular Atari game Centipede using the Cocos2D game engine for iOS. Centipede was originally developed for Atari and released on the Arcade in 1980. Since then, it has been ported to just about every platform imaginable. For our purposes, we will be calling the game Caterpillar.
Series Overview
This series will focus heavily on utilizing all that Cocos2D has to offer to create a complete game from start to finish. We will also be using some other tools such as Texture Packer to help us along the way. By the end of this series, you will have a fully functional Centipede clone containing graphics, simple animations, user interaction, artificial intelligence, game logic, and audio.
Caterpillar HD, the project this series teaches you to build, is a real game available on the iTunes App Store for free. So, the best way to see what this series is all about is to download the game and try it out for yourself!
Organization of the Series
This series is organized into 6 separate parts that will be released over the coming month or so.
- Part 1 – We will be focused on getting your assets and Cocos2D project set up. I will show you how to use Texture Packer to prepare your assets as well as how to start a new Cocos2D project, load the assets, and start the title screen.
- Part 2 – In this section, we will be setting up the game area. This will include getting all of the sprites into place and learning how to draw the game board.
- Part 3 – We will be building our basic caterpillar and getting it to move across the screen.
- Part 4 – This will be the most in-depth section. It will be all about the Caterpillar’s artificial intelligence and how it interacts with the world. Bring your thinking caps to this one.
- Part 5 – At some point, we need to make the game playable by someone. This section focuses on player interaction and the missile object used to kill the caterpillar. After this section, it will really start feeling like a game.
- Part 6 – In this wrap up of the series, we put on the polish with game audio, scoring, and restart conditions.
Step 1: Getting Cocos2D
Before you begin, you need to download and install a couple tools. The first is the Cocos2D game engine. You can obtain it from their website at http://cocos2d-iphone.org/download.
Once downloaded, you need to install their Xcode templates. This will make your life much easier in the future when you want to set up a project using Cocos2D. Here is their tutorial on how to do that. Don’t worry, this is really simple: just download the template tarball and then untar it in ~/Library/Developer/Xcode/Templates on your machine. The next time you open Xcode and create a new project, you should see a Templates category with several Cocos2D options.
Step 2: Texture Packer
Texture Packer is a fantastic tool that will take a set of textures, turn them into a single texture, and output a plist that tells Cocos2D how to use them. Having a single texture can save you quite a bit of disk space, load time, and complexity.
To get started, download Texture Packer from http://texturepacker.com. You can use the demo version for this tutorial but I strongly recommend purchasing this tool. It is well worth the money!
Importing Assets Into Texture Packer
Start by downloading the attachment for this tutorial. It contains both the standard and high definition versions of our images. Remember, the iPhone 3GS is free now, so there are still plenty of users not using retina display devices. Let’s not leave them out. ;)
Being that we have 2 separate versions of our images, you will need to perform this process twice. Simply drag all of the images in the HD folder except title-hd.png and game-over-hd.png into Texture Packer. It will be clear later why we are not including these two images.
Exporting Assets Out Of Texture Packer
Texture Packer will automatically lay out the images for you and create a single image that is as small as it can possibly be. Note that Cocos2D requires all image dimensions to be supplied in powers of 2.
Now that the images have been laid out, click the Publish button at the top. Name the output caterpillar-hd. Make sure to clear the images from Texture Packer and repeat this process for all of the standard definition images in the sd folder and name their output caterpillar.
You should now see a total of 4 files: caterpillar-hd.png, caterpillar-hd.plist, caterpillar.png, and caterpillar.plist.
Step 3: Creating A New Cocos2D Project
Open Xcode and create a new Cocos2D application. This should appear in your new project menu after installing the templates mentioned above.
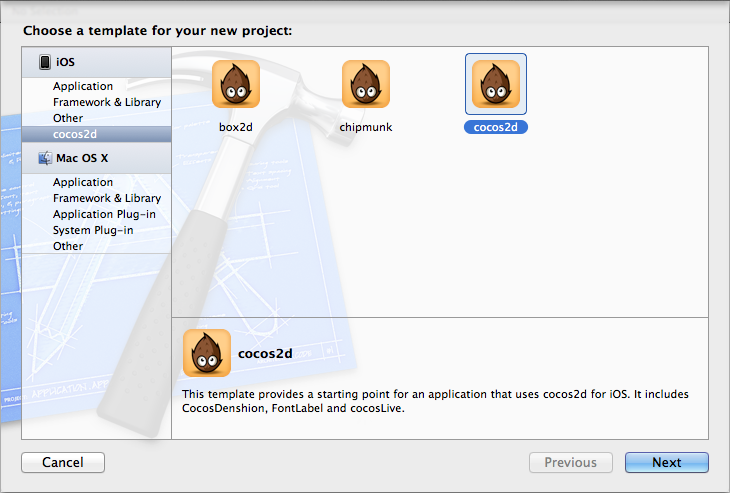
Name this project Caterpillar and Xcode will set up everything needed to start a basic project.
Step 4: The Game Scene
Cocos2D uses movie terminology to organize their objects (Director, Scene, etc…). The director is responsible for running and maintaining all of the scenes within the application.
Before we go any further, drag all of the caterpillar files that you created in the previous section into your project, as well as the few stragglers (title.png, title-hd.png, game-over.png, game-over-hd.png). Make sure to check the box to copy the files into your project directory.
By default, you are provided with a new scene and layer called HelloWorldLayer. Since we will be creating our own scene, we don’t need this in our project. Simply delete both the .h and .m files.
Create a new file that is a subclass of CCLayer called GameLayer. Paste in the following code for GameLayer.h.
#import "cocos2d.h"

@interface GameLayer : CCLayer {

}

@property(nonatomic, retain) CCSpriteBatchNode *spritesBatchNode;

+ (CCScene *) scene;

@end
This is basically the same content that was in the HelloWorldLayer with names changed to GameLayer and the additon of the spriteBatchNode property.
In Cocos2D, a CCSpriteBatchNode allows us to group all of our sprites up so that OpenGL ES displays them in a single call. OpenGL ES is essentially a state machine, and switching between states is often very costly, so you will want to do it as infrequently as possibly. You can have Cocos2D draw all of your sprites without a CCSpriteBatchNode, however you are not guaranteed when they will be drawn, therefore affecting performance.
The scene method is simply a class level method that will return a singleton instance of our GameScene. This will only be called when telling the director to start our game. We will see the implementation of that in a later section.
Open up GameLayer.m and add the following code:
#import "GameLayer.h"

@implementation GameLayer

@synthesize spritesBatchNode = _spritesBatchNode;

+(CCScene *) scene {
CCScene *scene = [CCScene node];

GameLayer *layer = [GameLayer node];

[scene addChild: layer];

return scene;
}

- (void) dealloc {
[_spritesBatchNode release];
[super dealloc];
}

-(id) init {
if( (self=[super init])) {

[CCTexture2D setDefaultAlphaPixelFormat:kCCTexture2DPixelFormat_RGBA4444];

// 1.
self.spritesBatchNode = [CCSpriteBatchNode batchNodeWithFile:@"caterpillar.png"];
[self addChild:self.spritesBatchNode];
// 2.
[[CCSpriteFrameCache sharedSpriteFrameCache] addSpriteFramesWithFile:@"caterpillar.plist"];

[CCTexture2D setDefaultAlphaPixelFormat:kCCTexture2DPixelFormat_RGB565];
// 3.
CCSprite * background = [CCSprite spriteWithSpriteFrameName:@"background.png"];
background.anchorPoint = ccp(0,0);
[self.spritesBatchNode addChild:background];

[CCTexture2D setDefaultAlphaPixelFormat:kCCTexture2DPixelFormat_Default];

}
return self;
}
@end
Starting with the scene method, we see all of the boilerplate code to initialize the main layer for this scene. We call the node method of our layer which initializes and returns it back to the caller. Finally the instantiated scene is returned. You will see code exactly like this in every scene that you create.
The init method is where we are going to be doing all of our setup for our game and loading the main spritesheet into memory.
- Is where we initialize our CCSpriteBatchNode object with our caterpillar.png sprite sheet file. It will also look for a file of the same name with a .plist extention in order to determine how to use the file.
- After the sprite sheet is loaded, we add all of the sprites to Cocos2D’s CCSpriteFrameCache. This caches the sprites so that when we want to use them over and over again, we don’t have to re-source them from disk. I strongly encourage using the cache here as it will drastically improve performance.
- Now we are able to fetch sprites out of the cache based on their original file names. This is thanks to the caterpillar.plist file informing Cocos2D of the mappings (I told you Texutre Packer was handy). In this case, we fetch the background out of the cache and add it as a child to our layer at position 0,0 (starting from the top left corner). This will display our game background.
Step 5: The Title Scene
Before we can begin playing our game, we need to present our title screen to the player. To do this, you must create another new file that is a subclass of CCLayer called TitleLayer.
The file TitleLayer.h is very straight forward. Add the following code:
#import "cocos2d.h"

@interface TitleLayer : CCLayer
+(CCScene *) scene;
@end
The only thing we added was the declaration for the scene method. Now, open up TitleLayer.m and add the following code:
#import "TitleLayer.h"
#import "GameLayer.h"
#import "CCTransition.h"

@implementation TitleLayer

+(CCScene *) scene {
CCScene *scene = [CCScene node];

TitleLayer *layer = [TitleLayer node];

[scene addChild: layer];

return scene;
}

-(id) init {
if( (self=[super init])) {
[CCTexture2D setDefaultAlphaPixelFormat:kCCTexture2DPixelFormat_RGB565];
// 1
CCSprite * background = [CCSprite spriteWithFile:@"title.png"];
background.anchorPoint = ccp(0,0);
[self addChild:background];

// 2
[[CCTouchDispatcher sharedDispatcher] addTargetedDelegate:self priority:0 swallowsTouches:YES];
}
return self;
}

- (BOOL)ccTouchBegan:(UITouch *)touch withEvent:(UIEvent *)event {
// 3
[[CCDirector sharedDirector] replaceScene:[CCTransitionFade transitionWithDuration:.5 scene:[GameLayer scene] withColor:ccWHITE]];
return YES;
}

@end
The code for this should look very similar to the GameLayer code that we discussed above. Here are the few key differences.
- This loads the background image for the title screen and displays it in our TitleScene’s main layer.
- In order for any layer in Cocos2D to accept touches, you must enable it using the swallowsTouches method. This will invoke some of the touch callback methods of the receiving delegate class. In our case, we only care about the ccTouchesBegan method.
- When the user taps the screen, this method will fire. Inside, we use the director to transition the scene from the TitleScene to the GameScene using a fade transition. You can see all of the different transition types inside of the CCTransition.h file.
Step 6: Running The Project
If you try to build and run the application at this point, you will get an error. That’s because the AppDelegate is still trying to load the HelloWorldLayer that you deleted before. We need to modify the code and tell it to start with our TitleLayer upon application startup.
Open up AppDelegate.m and import the TitleLayer:
#import "TitleLayer.h"
Also, be sure to delete the import for the HelloWorldLayer. Next, navigate to around line 113 and change [HelloWorldLayer scene] to [TitleLayer scene].
[[CCDirector sharedDirector] runWithScene: [TitleLayer scene]];
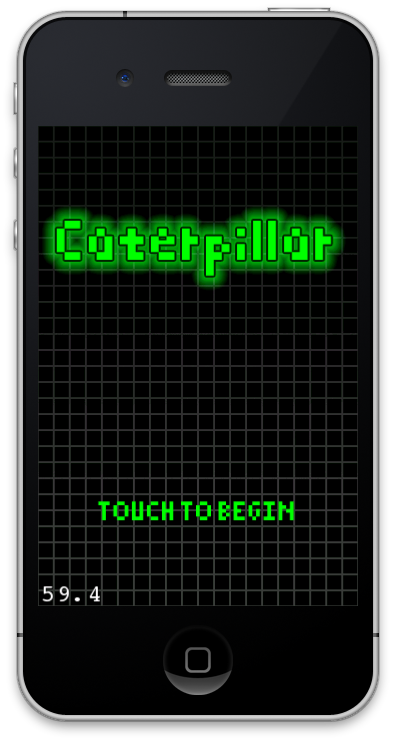
Now, hit the Run button…If you pasted the code correctly, you should see something like this:
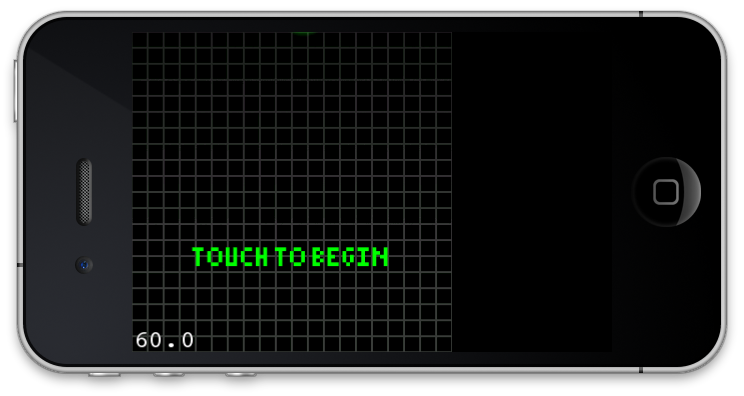
It appears that our game has been improperly oriented. This is an easy fix. By default, Cocos2D relies on the view controller that is displaying in it to determine the proper orientation. It’s currently set to landscape mode. Open up RootViewController.m and look in the “shouldAutorotateToInterfaceOrientation” method. Change the return statement of that method to be this:
return ( UIInterfaceOrientationIsPortrait( interfaceOrientation ) );
This will simply tell the view controller and Cocos2D to only support portrait mode. Now, when you hit Run, the game will be properly oriented and will function as you might expect.
Conclusion
What we have now is the ground work for our Cocos2D implementation of Centipede. It’s not much to look at right now, but know that this foundation is very important for our development going forward.
Next Time
In the next tutorial in this series, we will be setting up the interface elements including score, lives, and the sprout field.
Happy Coding!
没有评论:
发表评论