Welcome to the second part in our tutorial series on building a Hangman game for the iPad with Flash. While the first tutorial primarily focused on getting setup to code iOS apps with Flash, this tutorial will focus on the ActionScript and game logic necessary to actually program hangman. Let’s get started!
Where We Left Off. . .
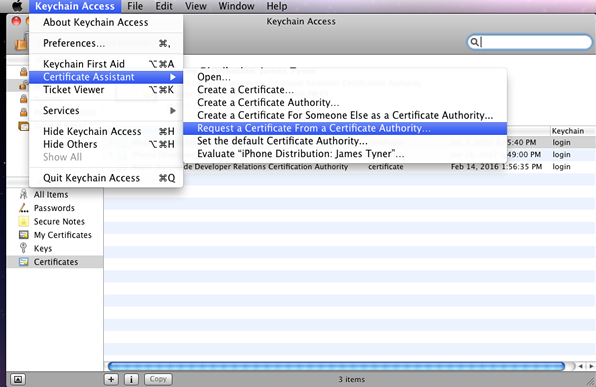
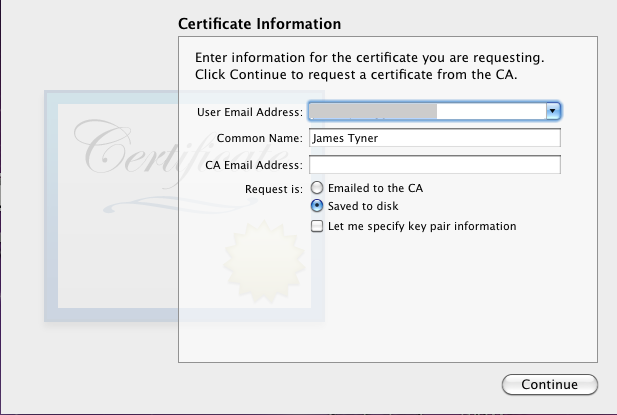
In the first part of this tutorial series, we went through the device provisioning process, adding an app icon and loading screen, and how to sync the app to your iPad during development. In this part of the tutorial, we will finish coding the gameplay.
Add the TweenLite Project
This tutorial will incorporate the TweenLite project, so go ahead and grab a copy. Once you have downloaded it, extract it and add the “com” folder to the same folder your hangman project is in. Finally, add the following along with the rest of your project imports:
import com.greensock.TweenLite;
Step 15: Adding a Guessword Text Field
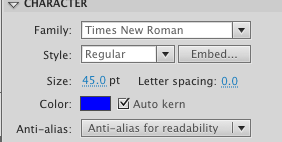
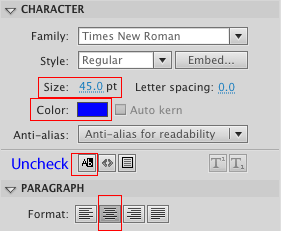
Select the Text Tool, make sure the TextField is not selectable, and that the following properties are set:
- Size: 45pt
- Color: #0000FF
- Align: Center
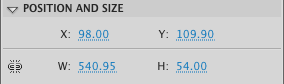
Draw a TextField out on the stage and set the following properties on it:
- X: 98.00
- Y: 110.00
- W: 540.95
- H: 54.00
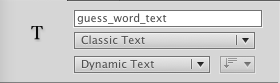
Give it the instance name “guess_word_text”.
Step 16: Creating the Game Buttons
Select the Oval Tool and make sure the following properties are set on it:
- Fill Color: #000000
- Stroke Color: #0000FF
- Stroke: 3.00
- Style: Solid
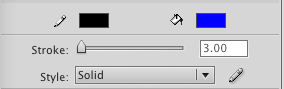
Hold “Shift” to conform the oval to a circle and drag out a circle onto the stage.
With the “Selection Tool” drag around the circle to select both the fill and stroke. You can tell they are both selected by a “Hatch Pattern”.
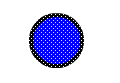
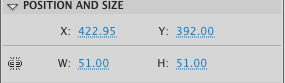
With both the fill and the stroke selected give the circle the following properties:
- W: 51.00
- H: 51.00
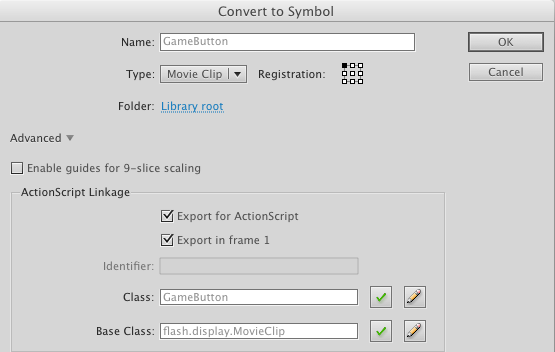
Now right click on the circle and choose “Convert To Symbol”. Give it the name “GameButton”, make sure “Export For Actionscript” is checked and
that the class is set to “GameButton”.
Now double click on it to go into editing mode. Select the Text Tool and make sure the following properties are set:
- Color: White
- Size: 20pt
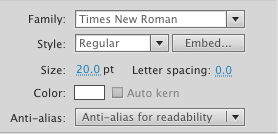
Drag out a TextField into the MovieClip and set the following properties on it:
- X: 11.00
- Y: 10.00
- W: 29.00
- H: 28.00
Make sure the TextField is not selectable:
Give the TextField the instance name “game_btn_text”.
Now Delete the Circle off the stage.
Step 17: Game Button Class
Go to File > New and choose “Actionscript File”. Save this as “GameButton.as” in the same folder as your “Hangman.fla”.
Enter the following code into the “GameButton.as”.
package  {

import flash.text.TextField;
import flash.display.MovieClip;
public class GameButton extends MovieClip{

public function GameButton() {
this.game_btn_text.selectable = false;
this.mouseChildren = false;

}

public function setText(theText:String):void{
this.game_btn_text.text = theText;
}
public function getText():String{
return this.game_btn_text.text;
}

public function disable():void{
this.mouseEnabled = false;
trace("YEAH");
}

}
}
Here we import the classes we need, set the
game_button_text to not be selectable, set mouseChildren to false so theTextField cannot recieve Mouse Events, added some getter and setter methods to set the text on the TextField, and a
disable() functionthat will disable the buttons from receiving Mouse Events. Get and set the text on the
game_btn_text.Step 18: Imports for the Main Game
Open “Main.as” which you should have available from part 1. Add the following imports to the top, underneath the package declaration:
import flash.events.MouseEvent;
import flash.net.URLRequest;
import flash.net.URLLoader;
import flash.events.Event;
import flash.display.Sprite;
These are the classes we will need througout this tutorial
Step 19: Creating the Variables
Enter the following code just below
public function Main extends MovieClip:public class Main extends MovieClip{
//Used for the TextFields on Our Game Buttons
var alphabetArray = ["A","B","C","D","E","F","G","H","I","J","K",
"L","M","N","O","P","Q","R","S","T","U",
"V","W","X","Y","Z"];
//The original word
var theWord:String;
//The guess Word
var guessWord:Array;
//An array for our game buttons
var gameButtonArray:Array = new Array();
//This will hold all the words
var wordList:Array;
//A Sprite we draw the hangman into
var hangmanContainer:Sprite;
//Number of Wrong Guess
var numWrong:int = 0;
Step 20: Creating the Game Buttons
Enter the following code below the
public function Main() constructor:private function setupGameButtons():void{
var xPos=150;
var yPos = 600;
gameButtonArray = new Array();
for(var i:int = 0;i<alphabetArray.length;i++){
if(i == 8 || i == 16){
yPos+= 65;
xPos = 150;
}
if(i == 24){
yPos+=65;
xPos = 330;
}
var gameButton = new GameButton;
gameButton.setText(alphabetArray[i]);
gameButton.x = xPos;
gameButton.y = yPos;
gameButtonArray.push(gameButton);
addChild(gameButton);
gameButton.addEventListener(MouseEvent.CLICK,checkLetter);
xPos+=60;
}
}
We first declare two variables
xPos and yPos. These hold the initial positions of our GameButtons. We then instantiate the
gameButtonArrayalphabetArray, creating a new GameButton. We Check if i is equal to8 or 16, and if it is we increment the
yPos variable by 65, and reset the xPos variable to 150. We then check if i is equalto 24, and if it is we increment
yPos by 65 and set xPos to 330. This lays out our buttons in a nice grid.We then create a
GameButton and set it’s text to the current letter in the alphabet array by using (alphabetArray[i]) we thenset the button’s
.x and .y by using xPos and yPos. We then push the button into the gameButtonArrayadd it to the stage and add an EventListener to it.
Last, we increment the
xPos by 60 so the next time through the loop the buttons will be staggered instead of on top of each other.Step 21: checkLetter Function
Enter the following code below the
setupGameButtons() you created above.private function checkLetter(e:MouseEvent):void{
var tempButton:GameButton = e.currentTarget as GameButton;
var theLetter = tempButton.getText().toLowerCase();
trace(theLetter);
}
Here we set up a
tempButton, and a theLetter variable which gets the buttons text and converts it to lowerCase. Then we trace theLetter tothe output panel.
Add the following within the
public function Main().public function Main() {
setupGameButtons()
}
Go ahead and test the Movie and you should see the Game Buttons nicely align on the stage, and if you click on them, the correct letter should
be traced to the output panel.
Step 22: Loading in a List of Words
We will be loading in an external .txt file that has the words used in this game, seperated by a newline character.
I downloaded a wordlist from SourceForge and am using the “variant_1-words.95″. I renamed it to
“wordlist.txt”.
Enter the following code below the
checkLetter function you created above.function doRequest():void{
wordList = new Array();
var loader:URLLoader = new URLLoader();
loader.load(new URLRequest("wordlist.txt"));
loader.addEventListener(Event.COMPLETE,wordListLoaded);
}
Here we set
wordList to a new Array, set up a URLLoader, load the “wordlist.txt”, and then setup an Event.COMPLETE listenerto the loader.
Step 23: wordListLoaded Function
Add the following below the
doRequest function you created in the step above:function wordListLoaded(e:Event):void{
var tempString:String = e.target.data as String;
trace(tempString);
}
Add the following to
public function Main().public function Main() {
setupGameButtons();
doRequest();
}
Go ahead and test the movie again. You should see the words from “wordlist.txt” traced to the output window.
Step 24: Creating the Guess Word
We will take the original word and replace all the characters with a “?”. However, some of the words contain apostrophes (‘), so we will replace those
where appropriate.
Add the following below the
wordListLoaded() function you created in the step above:function createGuessWord():void{
guessWord = new Array();
var randomWord = Math.floor(Math.random() * wordList.length);
theWord = wordList[randomWord];
trace(theWord);
theWord = theWord.substring(0,theWord.length-1);
for(var i:int = 0; i< theWord.length;i++){
if(theWord.charAt(i) == "'"){
guessWord[i] ="'";
}else{
guessWord[i]="?";
}
}
var newGuessWord = guessWord.join("");
guess_word_text.text = newGuessWord;
}
Since Strings are immutable in AS3, we will store each character in an array and then convert the array into a string. By using an array we can easily
change each individual character.
The first thing we do is set
guessWord to a new Array. We then chose a random element from our wordList array and set theWordequal to the random element from the wordlist, which in turn gives us a random word.
Next we use the
substring method to chop off the last character of the word. While testing I noticed the words had an extra space at the end of them. This takes care of that extra space.We then loop through
theWord character by character, check if the current character is an apostrophe(‘), and if it is we set the current index of the guessWordarray to an apostrophe(‘), otherwise we set it to a “?”.
Finally, we create a
newGuessWord by using the arrays built in the join method which takes the elements of an array and turns theminto a string. Finally, we set the
guess_word_text TextField’s text to the new GuessWord.Step 25: Reset Game
The
resetGame() function is where we will reset all of our game elements for a new game. For now we are just using it create the guessWord and setup our buttons.Enter the following code below the
createGuessWord function you created in the step above.function resetGame():void{
setupGameButtons();
createGuessWord();
}
Change the code within
public function Main() to the following.public function Main() {
doRequest();
}
Next add the following line to the
wordListLoaded function.function wordListLoaded(e:Event):void{
var tempString:String = e.target.data as String;
wordList = tempString.split("\n");
resetGame();
}
Here we add the words to the
wordList array using the Strings built in split() method, passing in “\n” since our wordsare separated by newline chracters, then we call the
resetGame function we created above.Go ahead and test the Movie and you should see that guessWord has been replaced by “?” and “‘” where appropriate.
Step 26: Drawing the Hangman Container
Our hangman is dynamically drawn using AS3′s drawing API. The first thing we need to do is draw the container for the hangman. Enter the following code
below the
resetGame() function:private function addHangmanContainer():void{
hangmanContainer = new Sprite();
hangmanContainer.x = 180;
hangmanContainer.y = 180;
hangmanContainer.graphics.lineStyle(3,0x000000);
hangmanContainer.graphics.drawRect(0,0,400,400);
addChild(hangmanContainer);
}
Here we set the
hangmanContainer to a new Sprite, set it’s .x and .y properties, and use the drawingAPI to set the
lineStyle to a 3px black line. Next we draw a rectangle using the drawRect() method and add it to the stage.Add the following to the
resetGame() function:function resetGame():void{
if(hangmanContainer != null){
removeChild(hangmanContainer);
hangmanContainer = null;
}
addHangmanContainer();
setupGameButtons();
createGuessWord();
}
We first check to make sure
hangmanContainer does not equal null. If it does not, then we remove it from the stage and set it to null, then weuse
addHangmanContainer to add it to the stage.Test the movie and you should see the hangman container positioned nicely above the buttons.
Step 27: drawHangman() Function
The
drawHangman() function will be used to draw the individual hangman pieces as the game progresses. Enter the following code below theaddHangmanContainer() function:function drawHangman(drawNum:int):void{
switch(drawNum)
{
case 0:
drawGallows();
break;
case 1:
drawHead();
break;
case 2:
drawBody();
break;
case 3:
drawArm1();
break;
case 4:
drawArm2();
break;
case 5:
drawLeg1();
break;
case 6:
drawLeg2();
break;
}
}
This function will take an int as a parameter and use a switch statement to decide which part of the hangman to draw.
Step 28: drawGallows() Function
The following code uses the drawing API to draw the gallows inside the hangmanContainer sprite. Add the following below the
drawHangman() function.function drawGallows():void{
hangmanContainer.graphics.moveTo(20,380);
hangmanContainer.graphics.lineTo(360,380);
hangmanContainer.graphics.moveTo(290,380);
hangmanContainer.graphics.lineTo(290,50);
hangmanContainer.graphics.lineTo(180,50);
hangmanContainer.graphics.lineTo(180,90);
}
Step 29: drawHead() Function
This code is used to draw the head of the hangman.Add the following code below the
drawGallows() function.function drawHead():void{
hangmanContainer.graphics.drawCircle(180,120,30);
}
Step 30: drawBody() Function
This code draws the body of the hangman. Add the following code belows the
drawHead() function:function drawBody():void{
hangmanContainer.graphics.moveTo(180,150);
hangmanContainer.graphics.lineTo(180,300);
}
Step 31: drawArm Functions
These two functions are used to draw the left and right arms. Add the following functions below the
drawBody() function:function drawArm1():void{
hangmanContainer.graphics.moveTo(180,200);
hangmanContainer.graphics.lineTo(130,190);
}
function drawArm2():void{
hangmanContainer.graphics.moveTo(180,200);
hangmanContainer.graphics.lineTo(230,190)
}
Step 32: drawLeg Functions
These two functions are used to draw the left and right legs. Add the following functions below the
drawArm2() function.function drawLeg1():void{
hangmanContainer.graphics.moveTo(180,300);
hangmanContainer.graphics.lineTo(130,330);
hangmanContainer.graphics.lineTo(120,320);
}
function drawLeg2():void{
hangmanContainer.graphics.moveTo(180,300);
hangmanContainer.graphics.lineTo(230,330);
hangmanContainer.graphics.lineTo(240,320);
}
Step 33: Creating the You Win Movie Clip
Go to Insert > New Symbol. Give it the name YouWin and make sure “Export for ActionScript” is checked and that the class is set to “YouWin”
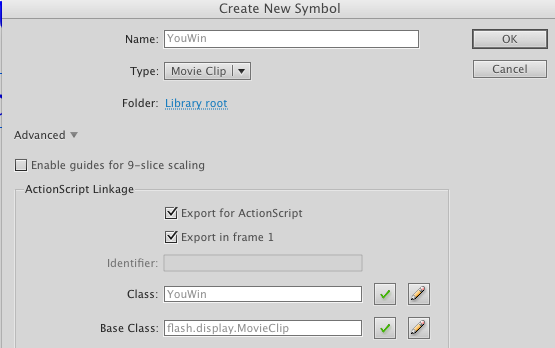
Select the Text Tool and make sure the following properties are set:
- Size: 14pt
- Color: #00FF00
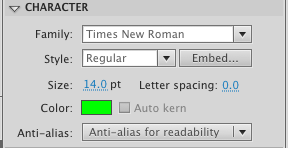
Drag out a TextField into the MovieClip and enter the words “YOU WIN!!” into it.
Next set the following properties on the TextField.
- X; -49.00
- Y: -8.00
- W: 104.00
- H: 19.00
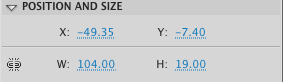
We need to create a variable to hold our YouWin MovieClip so enter the following at the bottom of your variable declarations:
var youwin:YouWin;
Step 34: Creating the You Lose Movie Clip
Go to Insert > New Symbol. Give it the name YouLose and make sure “Export for ActionScript” is checked and that the class is set to “YouLose”.
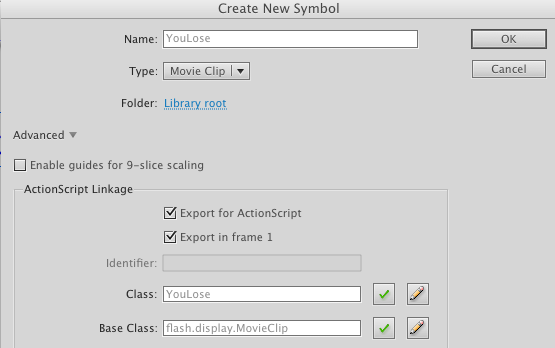
Select the Text Tool and make sure the following properties are set.
- Size: 14pt
- Color: #FF0000
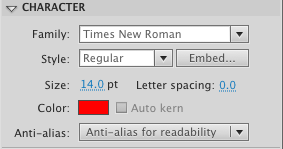
Drag out a TextField into the MovieClip and enter the words “YOU LOSE!!” into it.
Set the following properties in the TextField
- X; -49.00
- Y: -8.00
- W: 104.00
- H: 19.00
We need a variable to hold our YouLose MovieClip, so enter the following at the bottom of your variable declaration.
var youlose:YouLose;
Step 35: disableButtons() Function
Add the following code below the
drawLeg2() function.private function disableButtons():void{
for(var i:int = 0;i < gameButtonArray.length;i++){
gameButtonArray[i].disable();
}
}
This code simply loops through the
gameButtonArray and disables all the buttons.Step 36: Finishing checkLetter()
In this step we will finish off the
checkLetter() function which is where the heart of the game lies. Enter the following codeinside the
checkLetter() function you created earlier.private function checkLetter(e:MouseEvent):void{
var tempButton:GameButton = e.currentTarget as GameButton;
var theLetter = tempButton.getText().toLowerCase();
var correctGuess:Boolean = false;
var newGuessWord;
tempButton.removeEventListener(MouseEvent.CLICK,checkLetter);
removeChild(tempButton);
for(var i:int =0;i<theWord.length;i++){
if(theWord.charAt(i) == theLetter){
guessWord[i] = theLetter;
correctGuess = true;
}
}
newGuessWord = guessWord.join("");
guess_word_text.text = newGuessWord;
if(!correctGuess){
numWrong++;
drawHangman(numWrong);
}
if(newGuessWord == theWord){
disableButtons();
youwin = new YouWin();
youwin.x = 375;
youwin.y = 400;
addChild(youwin);
TweenLite.to(youwin,3,{scaleX:3,scaleY:3,onComplete:resetTheGame});
}
if(numWrong == 6){
disableButtons();
for( var j:int = 0; j < theWord.length;j++){
guessWord[j] = theWord.charAt(j);
newGuessWord = guessWord.join("");
guess_word_text.text = newGuessWord;
}
youlose = new YouLose();
youlose.x = 375;
youlose.y = 400;
addChild(youlose);
TweenLite.to(youlose,3,{scaleX:3,scaleY:3,onComplete:resetTheGame});
}
}
The
tempButton and theLetter variables were explained in the previous steps. The correctGuess variable is set tofalse at first, if the user chose a correct letter we set this to true. The
newGuessWord is a temporary variable we will use to construct the new word to display.Next, we remove the EventListener from the button and remove it from the stage.
We loop through
theWord character by character and check if the current character in theWord is equal to theLetter, andif it is, we set the appropriate letter in the
guessWord array to theLetter.We then use the join method of the String Class to turn our
guessWord array into a String (newGuessWord), and set the guess_word_text to newGuessWord.We check if
correctGuess is false, and if it is we increment numWrong and call our drawHangman function passing in numWrong.We then check if
newGuessWordM is equal to theWord and if it is, we disable the buttons, instantiate our youwin MovieClip, set its .xand
.y, add it to the stage and call TweenLite to animate it with an onComplete function.Lastly, we check if
numWrong is equal to six and if it is, we loop through theWord and set every letter in the guessWordarray equal to the current character in
theWord. We then use join as explained above and show the word. We disable the buttons, instantiate our youLose MovieClip,add it to the stage and once again call TweenLite to animate with an
onComplete function.Step 37: resetTheGame() Function
The
resetTheGame() functions are called when the animations of the youWin and youLose MovieClips are finished. Enter the following codebelow the
drawLeg2() function:function resetTheGame():void{
if(youwin!=null){
removeChild(youwin);
youwin = null;
}
if(youlose!=null){
removeChild(youlose);
youlose = null;
}
resetGame();
}
This function checks whether the
youWin and youLose are not null, and if they are not we call removeChild to removethem from the stage and set them to null. Finally we call the
resetGame function.Step 38: Finishing resetGame()
We need to do some final cleanup in the
resetGame function. Add the following code to the resetGame() function:function resetGame():void{
numWrong = 0;
if(gameButtonArray.length>0){
for(var i:int =0;i<gameButtonArray.length;i++){
if(gameButtonArray[i].stage){
removeChild(gameButtonArray[i]);
}
}
}
if(hangmanContainer != null){
removeChild(hangmanContainer);
hangmanContainer = null;
}
addHangmanContainer();
setupGameButtons();
createGuessWord();
drawHangman(numWrong);
}
We first reset
numWrong to 0, then we loop through the gameButtonArray, check if the buttons are on the stage, and if theyare we remove them.
Step 39: Adding the WordList
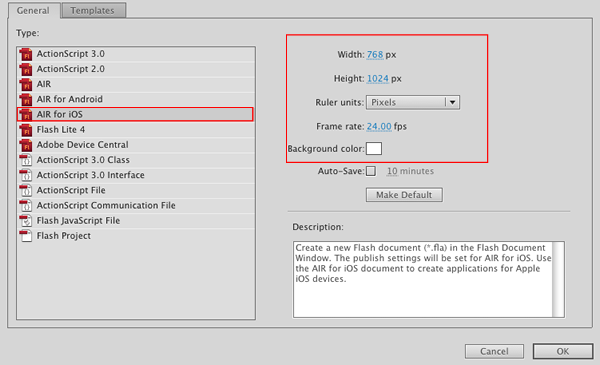
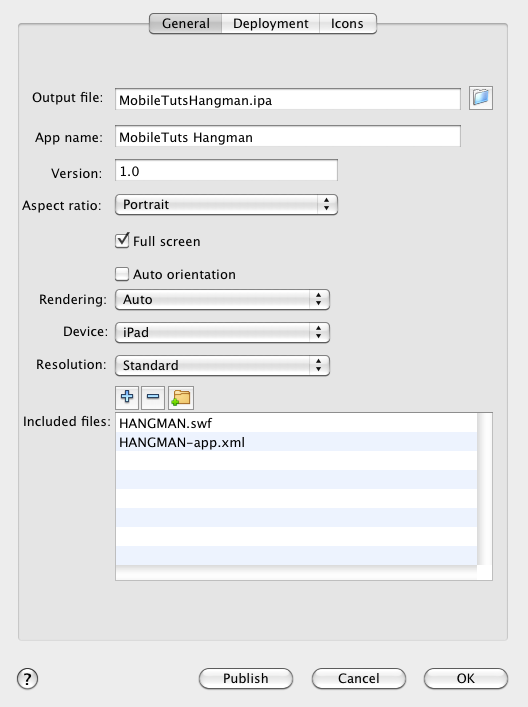
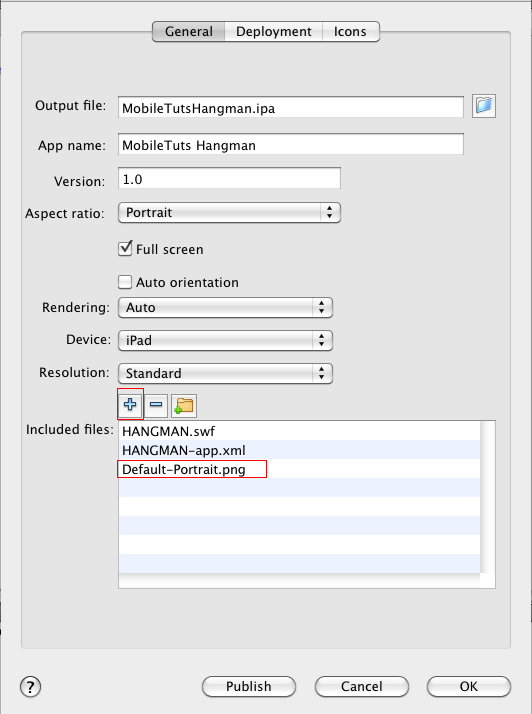
You will need to include the "wordlist.txt" to the included files. So go to the "AIR for IOS" settings and on the "General" tab click on the "+" button
and browse to the "wordlist.txt" adding it to the included files.
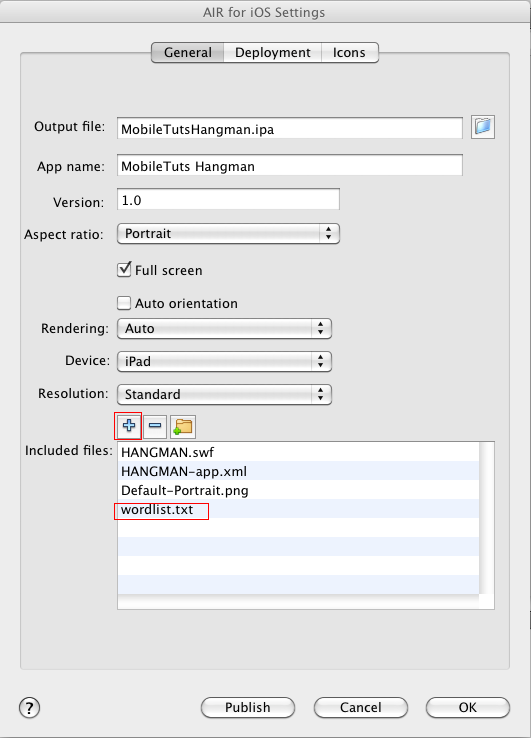
This completes our game! The next step is to publish for the App Store, and upload through iTunes Connect.
Step 40: Preparing for the App Store
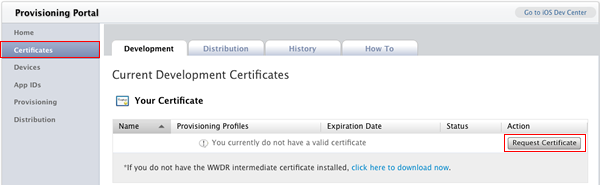
You will first need to generate a "Distribution" Provisioning Profile. Follow the steps in Step 4 of the first part of the tutorial, but
make sure you are under "Distribution" instead of development.
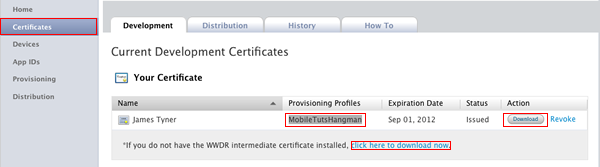
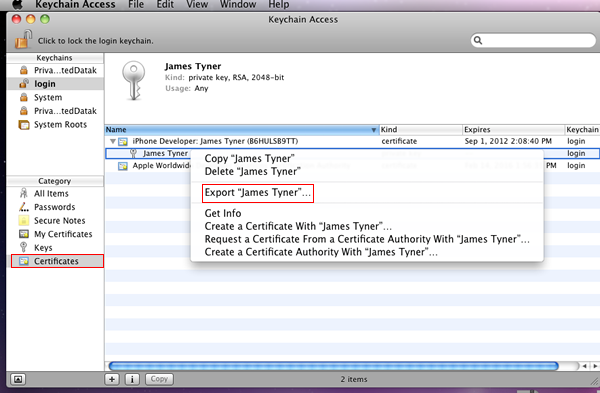
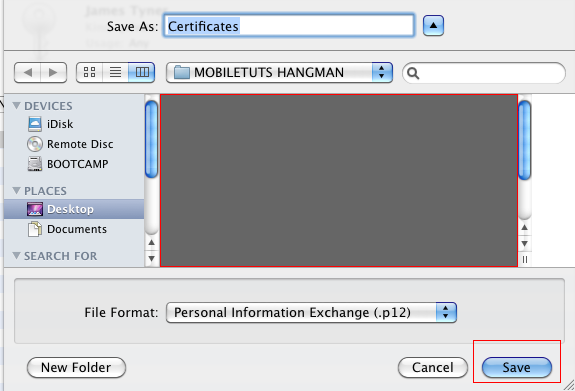
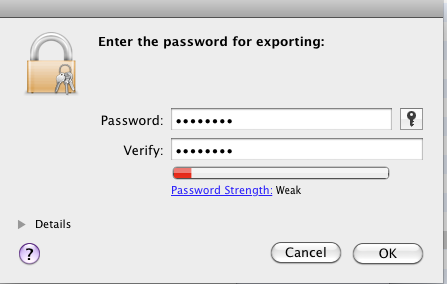
Next you will need to download the "Distribution" certificate and convert it to a .P12 following the example from Step 5 of the first part of this series.
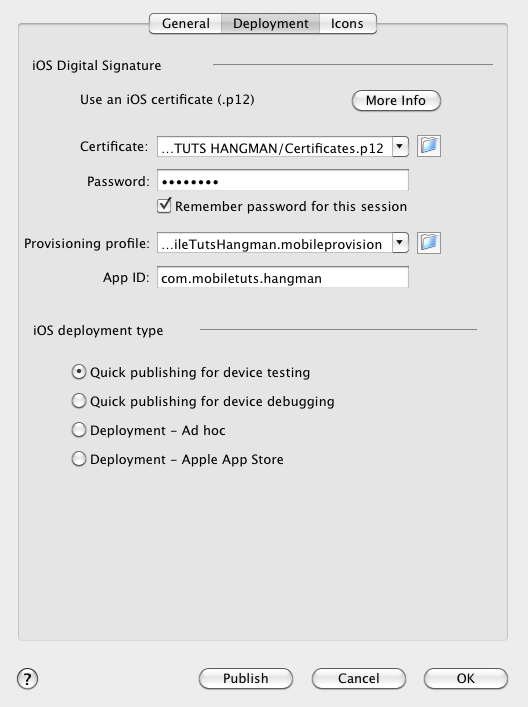
Then, go back to the "Air For IOS" and under the "DEPLOYMENT" tab, swap out the devlopement .P12 with the distribution .P12, and swap out the devloper provisioning file
with the distributuion profile, make sure you tick off "Deployment - Apple App Store" and click publish.
Lastly, log into iTunes Connect, Go to "Manage Applications" and add a new App, follow the instructions, the upload your app with "App Loader".
Conclusion
This series gave a good introduction to Mobile Development with Flash CS5.5. Hopefully you've learned something useful and thank you for reading! If you want to see more Flash CS 5.5 iOS development content, leave a comment below!